FOR PERFECT TURNS: SKI CARE TIPS FROM STÖCKLI
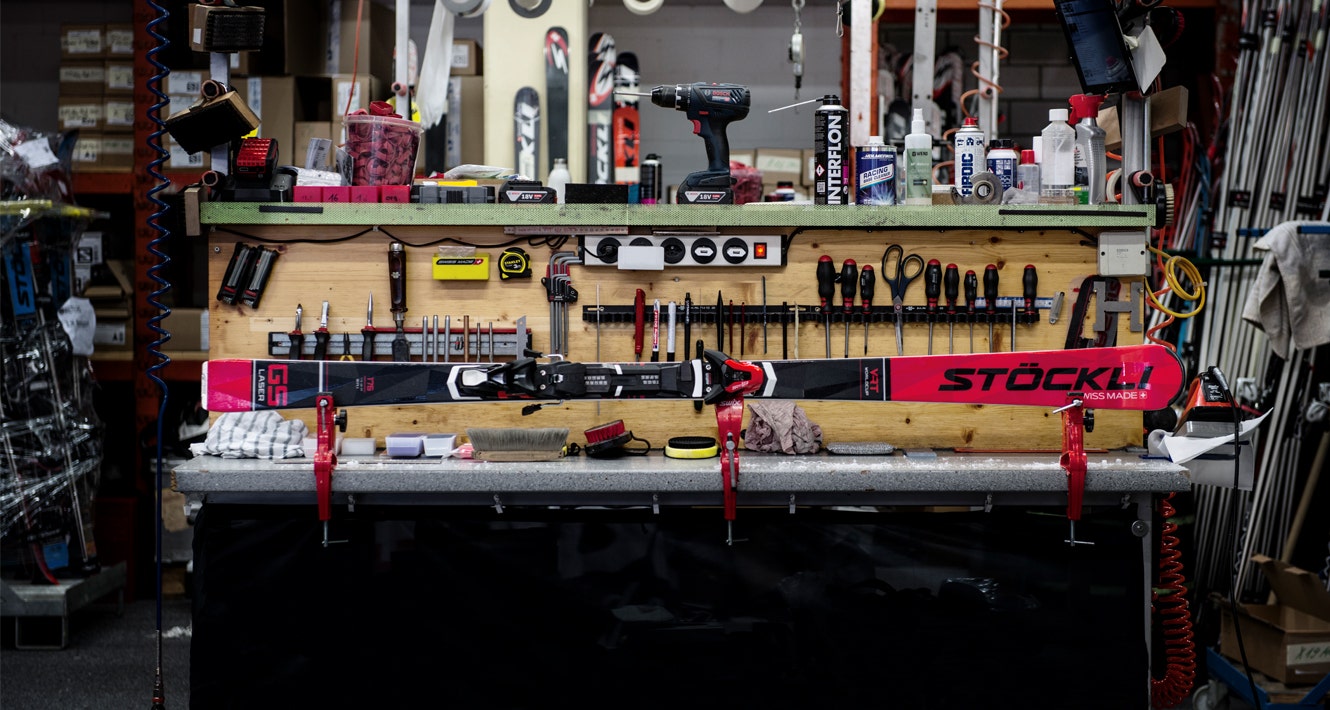
The right ski care is a key element on the must-do schedule of every skier. If you are waxing your skis and prepping their edges regularly, you will always have good control, the highest safety and of course, last but not least, the speed you need to conquer a mountain. Find out here how waxing with hot wax is done, and how you can maintain sharp edges. Then discover a few tips and tricks when it comes to ski care, so you’ll be able to dance down the slope with perfect turns for a long time.
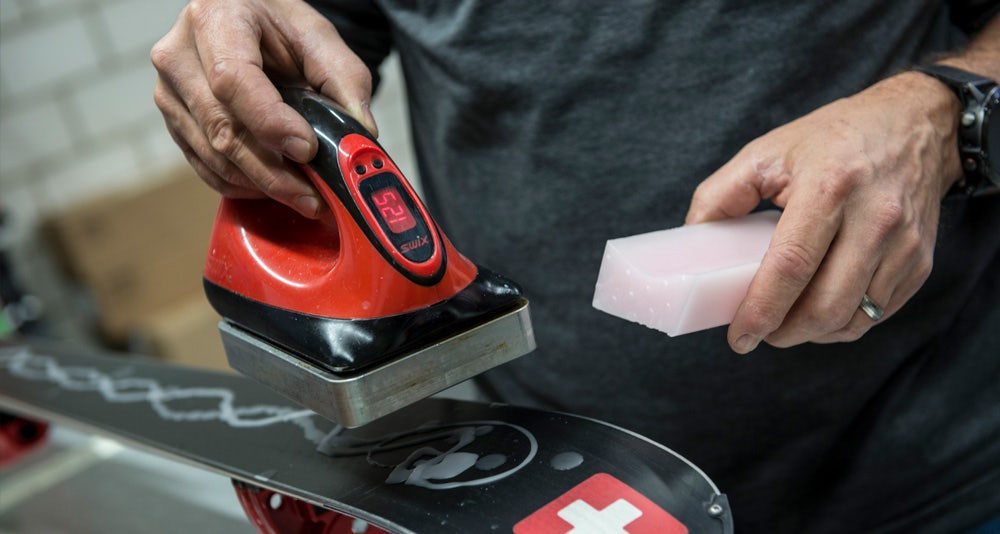
If the iron is not used anymore for clothes, then it is totally possible to fetch an old iron from the closet or to use your grandma’s. Pay attention, however, that it is not a steam iron and that you can adjust the iron’s heat settings. Since there are indeed special waxing irons, we recommend you get your hands on one of those. Then you will always have a consistent temperature, the ability to monitor the temperature on the display, and you can adjust the temperature accordingly. This is vital since not every wax requires the same temperature.WHAT IRON DO I USE? DOES MY GRANDMA’S IRON WORK?
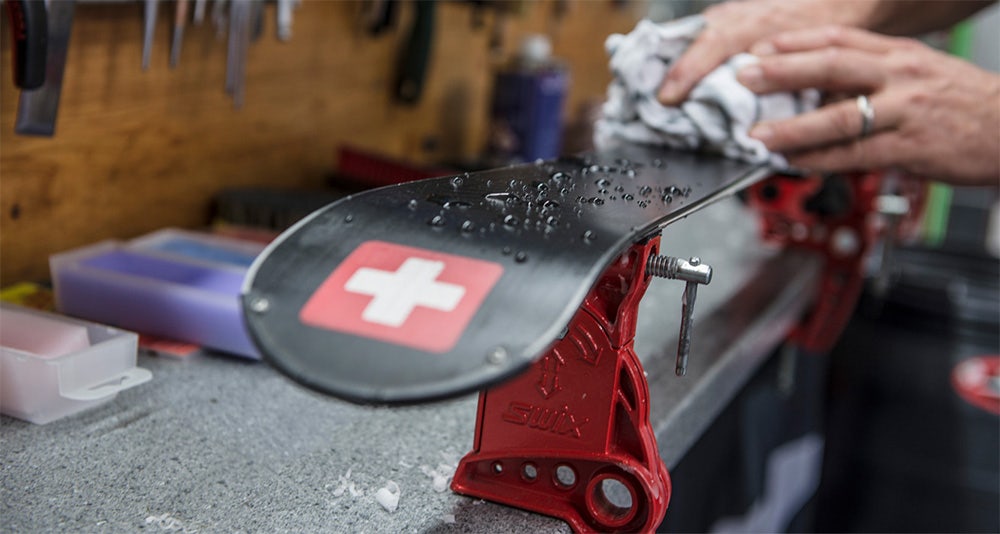
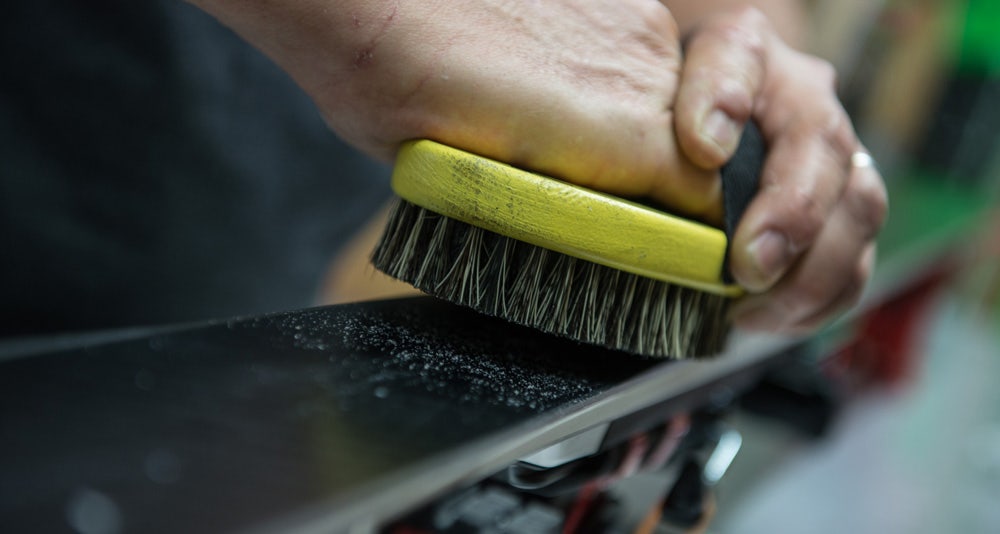
STEP 1: PREPPING YOUR SKIS Before you start to wax, it is important you have cleaned and dried your skis. Best to dry the base with a microfiber cloth and take care that there is not any more snow clinging to the binding. Then remove old wax from the base with a wax remover and ensure any dirt or debris has been completed wiped off, too. Best is to have whipped your edges into shape with a diamond stone before waxing (read more about this in the answer to the question: TUNING EDGES, HOW DOES THAT WORK?) We suggest you mask off the binding area with painter’s tape. Plus, we suggest you lock into place the ski stoppers with stopper rubber bands so they do not get in the way during waxing and you can work cleanly with the iron. When you have taken care of all of this, secure the ski on a table with a vise. Pay attention that you just lay the ski in it and don’t tension the ski in any way. In this way, you will prevent the ski from losing its camber in the vise. STEP 2: WAXING YOUR SKIS Set the iron’s temperature and wait until it has reached the correct temperature. The hardness of the wax determines the iron’s temperature. The harder the wax, the hotter the iron’s setting should be. For most wax, the temperature for the iron is on the packaging. The rule of thumb though is between 100° and 130°C. Then apply the wax to the ski with the iron. Do this by holding the block of wax on the iron and letting the wax drip onto the ski. Take care that the drops of wax are distributed across the middle. Then iron on the wax with a smooth, gliding movement. The warming opens pores, and the wax is drawn into the ski. The iron should never be allowed to get too hot and should not remain on one spot too long. That could risk damage to the base. Tip: Always iron in just one direction – away from the ski tip. Clean the iron after use. SCHRITT 3: LETTING IT REST Once you have applied the wax, you need to give it enough time to be drawn into the pores. Ideal is to let your skis sit overnight and then remove excess wax the next day. If you don’t have time for that, we recommend you let the skis sit for at least an hour. This should be in a dry room without big temperature fluctuations. SCHRITT 4: SCRAPING AND BRUSHING After letting the wax do its job, you can then remove the wax with a wax scraper in the direction of movement (i.e. away from the tip). With this, it is essential that you remove the wax one layer at a time and that you remove any wax remains from the edges. After that, you can begin to brush the wax. In doing this, you remove the all the bits of wax from the ski, and you bring out the structure of the base. Tip: There are various brushes that differentiate themselves by their degrees of hardness. To be sure you are sufficiently equipped, we recommend two brushes: One stiffer and one softer. First, you should remove larger residue with the stiffer brush and then you should work it with the finer brush.WAXING WITH HOT WAX: HOW DOES THAT WORK?

In contrast to hot wax that needs time to move into the ski base’s pores, express wax is simply applied to the surface. That is in fact done quickly and easily but has the disadvantage that it does not hold up very long. A good mix of both wax types is critical here. If you would like to get your ski solidly into shape and give it the right care so you are up among the fast skiers again, then select hot wax. If your ski is basically still in good shape but just needs a little pick-up, then choose the express wax.WHY ISN’T AN EXPRESS WAX SUFFICIENT?
Of course, this question depends on how many days over the winter you are out on your skis. It depends, too, where you ski and how hard the slopes are. Artificial snow, hardpack, and salt are more damaging to your base and your edges, which is why in those cases good care is indispensable. The more the ski is waxed, the better condition it will be in. In racing, skis are waxed after every use. If you begin to notice the base looks a little gray and seems brittle, it is then high time to wax your skis. These signs usually come along with poor gliding characteristics on the snow and slopes. The pleasure in carving slowly wanes and your ski lift pass literally falls into disuse.HOW OFTEN SHOULD I WAX MY SKIS?
Essentially, you can use the same wax products for your Nordic skis as you do for your Alpine skis. The process is also the same. Because in Nordic skiing however you normally cover more distance and thus have more friction on the base, we recommend you use a colder wax.IS THERE A DIFFERENCE BETWEEN WAX FOR ALPINE AND NORDIC SKIS?
Skis are like cars: You yourself can only do so much – it still has to go in for service, too. Logically, consider the following: The more often you ski, the more often service is advised. Service at least once a year is an absolute must for every ski – either at the start of the season or the end. Two or three times each season is however recommended.WAX OR NOT. HOW OFTEN SHOULD I TAKE IN MY SKIS FOR SERVICE?
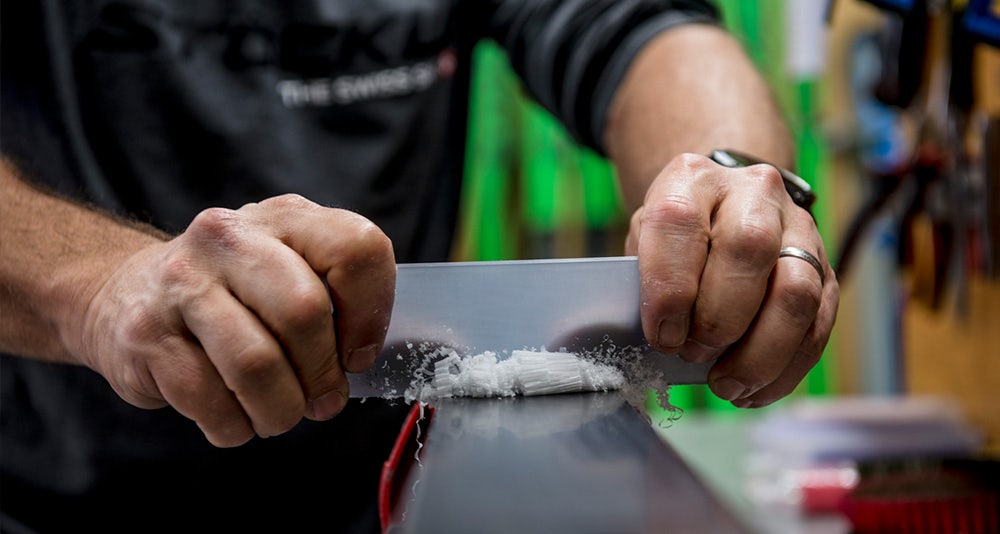
Tuning edges is an art in itself. We advise that you let the pros take care of this when you take your skis in for service. Because then your edges will not only be well tuned, but also uneven places such as scratches or mars from impacts will be fixed. Since edges are primarily dulled by hardpack or artificial snow, you can help prevent this starting at home. To this end, we recommend a diamond stone. This is how it works: Put your ski in the vise with the base up. Use a diamond stone (200, 400 or 600) to file the edge from the base side with the base bevel angle (0.5° or 0.7°). Moisten the diamond stone lightly with water and file at a 45° angle (base/bevel angle) to the edge. Position the ski (sidewalls and edges up) and secure it in the vise. Free the edge with a sidewall plane. Affix the diamond stone at an angle (88°/87° Grad). Moisten the diamond stone and sharpen the sidewalls. Take care that the edge is always lying smoothly on the ski. After sharpening, clean edges and base with a cloth.TUNING EDGES. HOW DOES THAT WORK?

Ski tuning ex factory
Ski Base
BevelSide
Bevel Laser WRT 1° 2° Laser WRT Pro 1° 2° Laser GS 1° 2° Laser SL 1° 2° Laser SC 1° 2° Laser SC Orea 1° 2° Laser MX 1° 2° Laser CX 1° 2° Laser SX 1° 2°
Montero AR 1.5° 2° Montero AX 1.5° 2° Nela 80 1.5° 2° Nela 88 1.5° 2° Stormrider 88 1.5° 2° Laser AR 1.4° 2° Laser AX 1.4° 2°
Nela 96 1.5° 2° Stormrider 95 1.5° 2° Stormrider 102 1.5° 2°
Edge 88 1.5° 2° Edge FT 1.5° 2°
Laser GS FIS 0.5° 3° Laser SL FIS 0.5° 3° Laser SX FIS 0.7° 3°
Before you put away your skis for their well-earned break, it’s important that you clean them thoroughly. That means: Remove all dirt and debris and old wax with a wax remover, and be certain that your skis are completely dried with a microfiber cloth. Moisture is poison for edges. Once you have taken care of this, you can apply wax to your skis and work it in with an iron. Tip: Do not store your skis for the summer without wax. A waxed ski offers the following benefits:HOW TO I PREPARE MY SKIS FOR THE SUMMER BREAK?
Along with pre-waxing, take to heart the following tips for summer storage:HOW DO I OVER-SUMMER MY SKIS CORRECTLY?
AM I READY FOR THE COMING SEASON? CHECKLIST!